之前搭建hexo博客,是将其部署到 github 中,通过 github.io 来访问,但是速度感人,所以本次尝试将 hugo 博客部署到阿里云服务器,通过域名进行访问,本文参考了hugo博客部署到腾讯云轻量级服务器。
由于是我第一次使用 nginx,所以如果遇到什么问题,请多海涵并且可以参考其他博客或网络资料。
在部署之前,我已经有了阿里云服务器(配置为2核2GB)、阿里云购买的域名(fireflyyh.top)。
1. 服务器端下载并安装nginx#
1.1 安装nginx#
在 ubuntu 环境下:
安装 nginx
将 nginx 设置为开机启动:
1
| sudo systemctl enable nginx
|
启动 nginx:
1
| sudo systemctl start nginx
|
1.2 测试nginx#
查看 nginx 状态
1
| sudo systemctl status nginx
|
如果没问题,则会出现:
 1
 2
 3
 4
 5
 6
 7
 8
 9
10
11
12
13
14
15
16
17
| ● nginx.service - A high performance web server and a reverse proxy server
Loaded: loaded (/lib/systemd/system/nginx.service; enabled; vendor preset: enabled)
Active: active (running) since Fri 2024-07-26 21:46:50 CST; 1 day 13h ago
Docs: man:nginx(8)
Process: 164834 ExecStartPre=/usr/sbin/nginx -t -q -g daemon on; master_process on; (code=exited, status=0/SUCCESS)
Process: 164836 ExecStart=/usr/sbin/nginx -g daemon on; master_process on; (code=exited, status=0/SUCCESS)
Main PID: 164837 (nginx)
Tasks: 3 (limit: 1947)
Memory: 4.1M
CPU: 26ms
CGroup: /system.slice/nginx.service
├─164837 "nginx: master process /usr/sbin/nginx -g daemon on; master_process on;"
├─164838 "nginx: worker process" "" "" "" "" "" "" "" "" "" "" "" "" "" "" "" "" "" "" "" "" "" "" "" "" "" "" ""
└─164839 "nginx: worker process" "" "" "" "" "" "" "" "" "" "" "" "" "" "" "" "" "" "" "" "" "" "" "" "" "" "" ""
Jul 26 21:46:50 Firefly-Aliyun systemd[1]: Starting A high performance web server and a reverse proxy server...
Jul 26 21:46:50 Firefly-Aliyun systemd[1]: Started A high performance web server and a reverse proxy server.
|
通过阿里云服务器管理面板中的安全组标签,将服务器的80端口开放。接下来访问http://<服务器IP地址>,如果出现了 nginx 页面,则代表着配置成功。
2. 配置nginx#
进入/etc/nginx/,目录树如下:
 1
 2
 3
 4
 5
 6
 7
 8
 9
10
11
12
13
14
15
16
17
18
19
20
21
22
23
24
25
26
27
| .
├── conf.d
├── fastcgi.conf
├── fastcgi_params
├── koi-utf
├── koi-win
├── mime.types
├── modules-available
├── modules-enabled
│ ├── 50-mod-http-geoip2.conf -> /usr/share/nginx/modules-available/mod-http-geoip2.conf
│ ├── 50-mod-http-image-filter.conf -> /usr/share/nginx/modules-available/mod-http-image-filter.conf
│ ├── 50-mod-http-xslt-filter.conf -> /usr/share/nginx/modules-available/mod-http-xslt-filter.conf
│ ├── 50-mod-mail.conf -> /usr/share/nginx/modules-available/mod-mail.conf
│ ├── 50-mod-stream.conf -> /usr/share/nginx/modules-available/mod-stream.conf
│ └── 70-mod-stream-geoip2.conf -> /usr/share/nginx/modules-available/mod-stream-geoip2.conf
├── nginx.conf
├── proxy_params
├── scgi_params
├── sites-available
│ └── default
├── sites-enabled
│ └── default -> /etc/nginx/sites-available/default
├── snippets
│ ├── fastcgi-php.conf
│ └── snakeoil.conf
├── uwsgi_params
└── win-utf
|
根据参考博客,要在nginx.conf文件中编辑Server字段,但是在我的这个文件中,并没有出现该字段。经过查阅资料,可以在./sites-available/default当中编辑。
当没有SSL证书时:
 1
 2
 3
 4
 5
 6
 7
 8
 9
10
11
12
13
14
15
16
17
18
19
20
21
22
23
24
25
26
27
28
| server {
listen 80 default_server;
listen [::]:80 default_server;
# 修改页面所在目录
root /home/firefly/Codes/blog/public;
# Add index.php to the list if you are using PHP
index index.html index.htm index.nginx-debian.html;
# 修改域名
server_name www.staryh.top;
# 修改
location / {
# First attempt to serve request as file, then
# as directory, then fall back to displaying a 404.
root /home/firefly/Codes/blog/public;
index index.html index.htm;
# try_files $uri $uri/ =404;
}
error_page 404 /404.html;
location = /404.html {
root /home/firefly/Codes/blog/public;
}
}
|
经过上述修改之后,输入服务器 IP 地址,就可以访问了
3. 将域名绑定到服务器#
需要域名备案,否则访问不了
在阿里云购买的域名,然后通过更改 DNS 解析来将该域名定向至该服务器的IP地址
4. 实现本机和服务器的public文件夹同步#
在这一部分,我的想法比较复杂。
- 将本地的博客文件夹放到 github 中,方便更多人能够访问我的博客所有的文件。
- 考虑到github的访问速度,打算在 gitee 中建立一个镜像的仓库,以实现 github 和 gitee 的博客文件夹的同步。
- 这样服务器只需要 pull gitee 仓库中的 public 子文件夹,便可以得到本地主机 push 到 github 仓库中的 public 文件夹。
4.1 本地->github#
将本地博客文件夹 push 到github仓库中
4.2 github->gitee#
- 在 gitee 上绑定 github 账号;
- 在 gitee 中创建同名仓库,在仓库的
管理标签页,选择仓库镜像管理,添加镜像,选择镜像方向为pull gitee <- github,选择正确的镜像仓库,并添加私人令牌,私人令牌在github界面->用户头像->settings->developer settings->personal access tokens中获取,勾选自动同步。
这样每次本地编辑完并上传 github 之后,稍等片刻就能在 gitee 看到修改了😊
截止到写本篇博客时,gitee 的仓库镜像管理功能一直存在,且可以自动同步。如果该自动同步功能不见了,可以尝试一篇教你代码同步 Github 和 Gitee中的做法。
4.3 gitee->服务器#
- 进入到修改页面所在目录的父目录
/home/firefly/Codes/blog,删除原来通过xtfp传输来的public文件夹; - 在本地仓库根目录下,通过
git config core.sparseCheckout true 来启用sparseCheckout; - 打开
./.git/info,然后编辑其中的sparseCheckout文件(如果没有可以新建),将需要指定 pull 的文件夹位置输入进去:/public; - 回到blog目录,添加远程仓库,并 pull(在pull的时候遇到了公私钥导致无法访问的问题,具体解决参考了解决 “fatal: Could not read from remote repository.“)。
1
| git remote add origin git@gitee.com:yourname/yourrepo.git
|
5. SSL证书#
5.1 获得SSL证书#
由于阿里云策略改变,目前免费的只有个人测试证书(原免费证书)。
根据Nginx或Tengine服务器配置SSL证书来进行配置。
其中,将下载的证书相关文件解压缩到/etc/nginx/中,
5.3 修改nginx配置#
同样地,在default文件中,结合了本文提到的两个博客,增加以下内容:
 1
 2
 3
 4
 5
 6
 7
 8
 9
10
11
12
13
14
15
16
17
18
19
20
21
22
23
24
25
26
| server {
listen 443 ssl;
server_name www.fireflyyh.top;
root /home/firefly/Codes/blog/public;
ssl_certificate /etc/nginx/fireflyyh.top.pem;
ssl_certificate_key /etc/nginx/fireflyyh.top.key;
ssl_session_cache shared:SSL:1m;
ssl_session_timeout 5m;
#自定义设置使用的TLS协议的类型以及加密套件(以下为配置示例,请您自行评估是否需要配置)
#TLS协议版本越高,HTTPS通信的安全性越高,但是相较于低版本TLS协议,高版本TLS协议对浏览器的兼容性较差。
ssl_ciphers ECDHE-RSA-AES128-GCM-SHA256:ECDHE:ECDH:AES:HIGH:!NULL:!aNULL:!MD5:!ADH:!RC4;
ssl_protocols TLSv1.1 TLSv1.2 TLSv1.3;
#表示优先使用服务端加密套件。默认开启
ssl_prefer_server_ciphers on;
error_page 404 /404.html;
location = /404.html {
root /home/firefly/Codes/blog/public;
}
}
|
然后重启nginx服务:sudo systemctl restart nginx。
6. 站点分析#
6.1 Google Analytics#
本博客建立时所采用的 hugo 版本为 v0.129.0,采用的主题 PaperMod 的版本为 v7.0。
获取追踪ID#
登录Google Analytics:
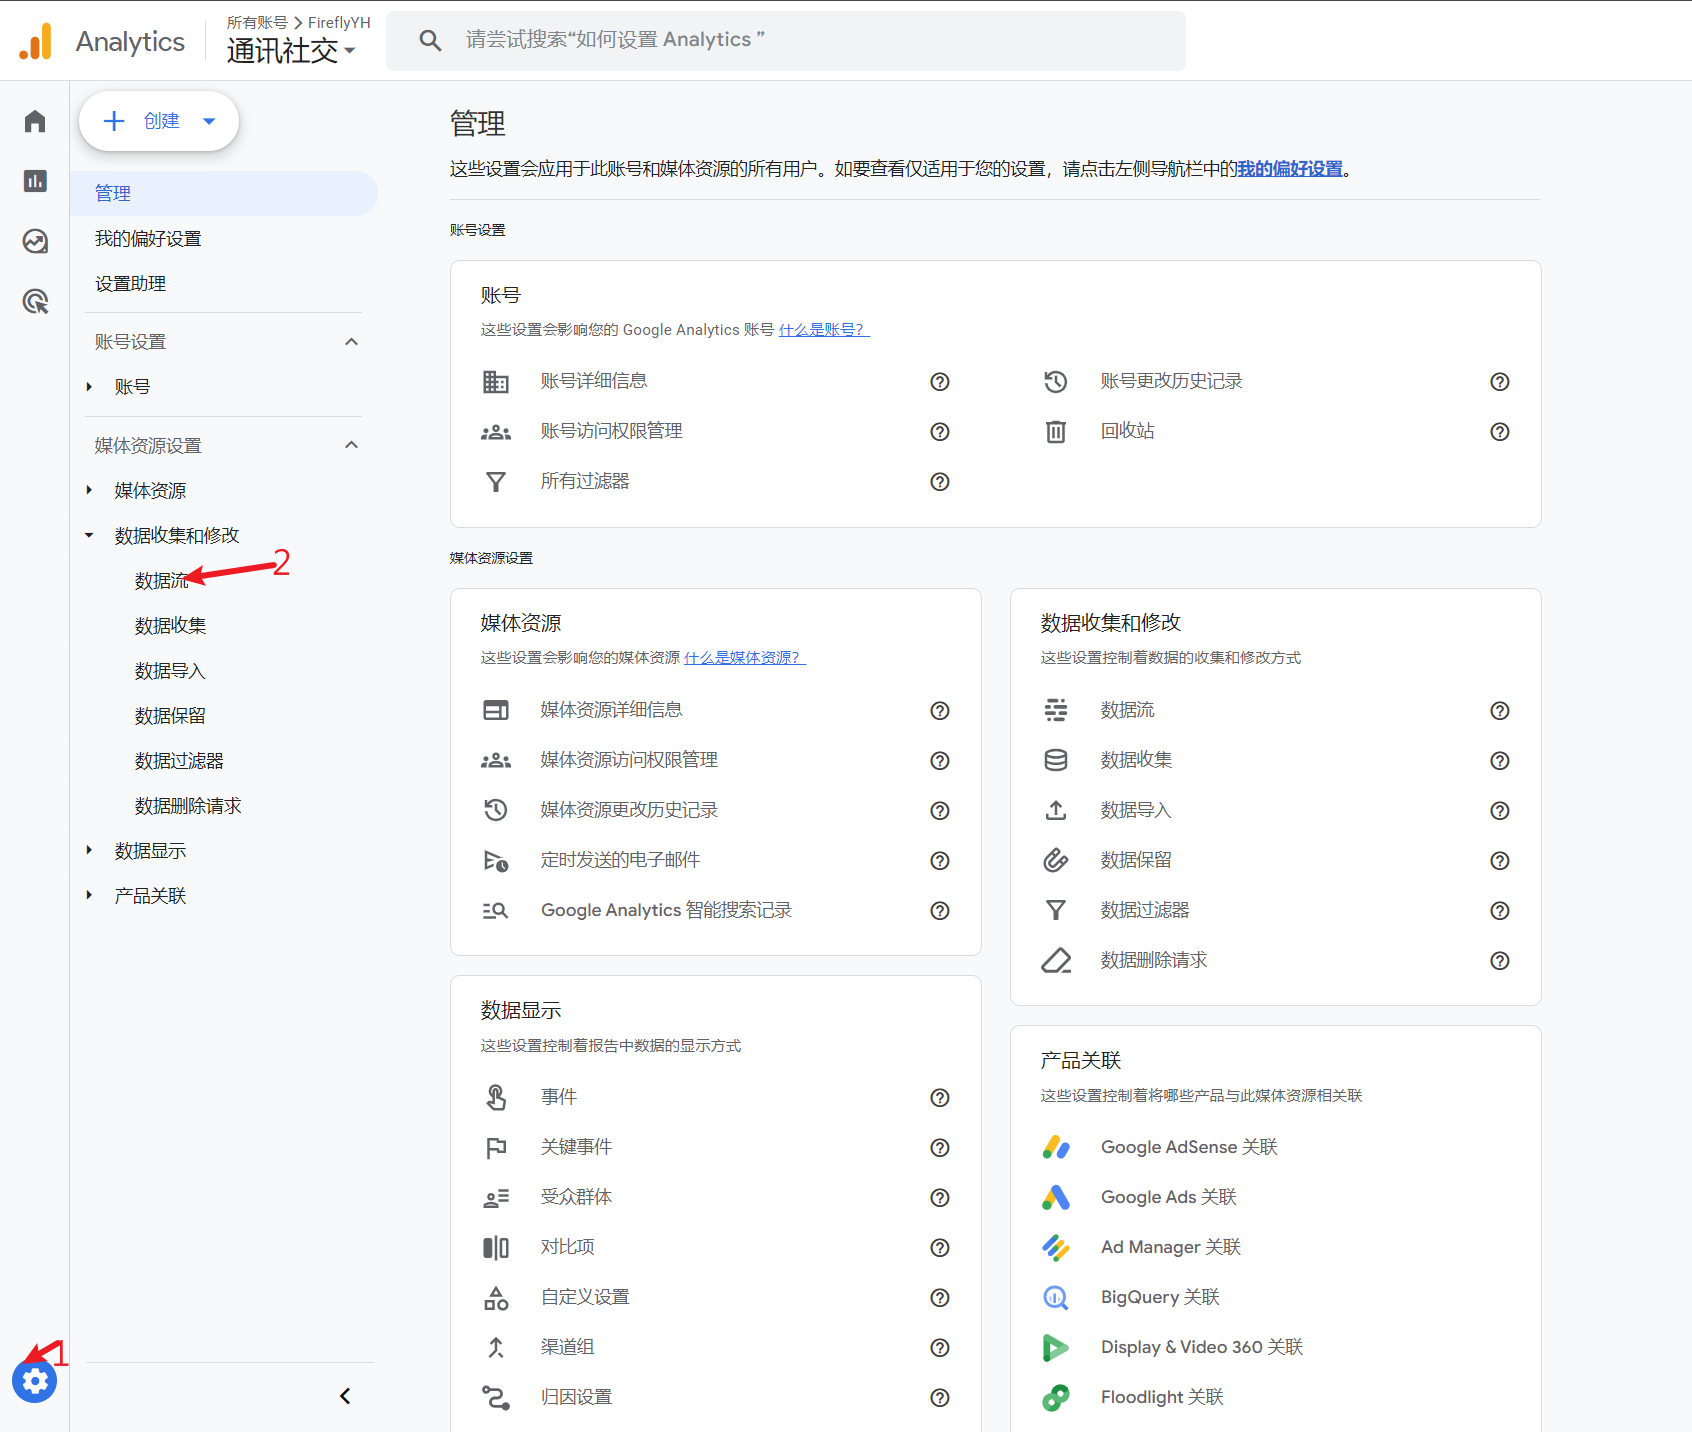
进入数据流

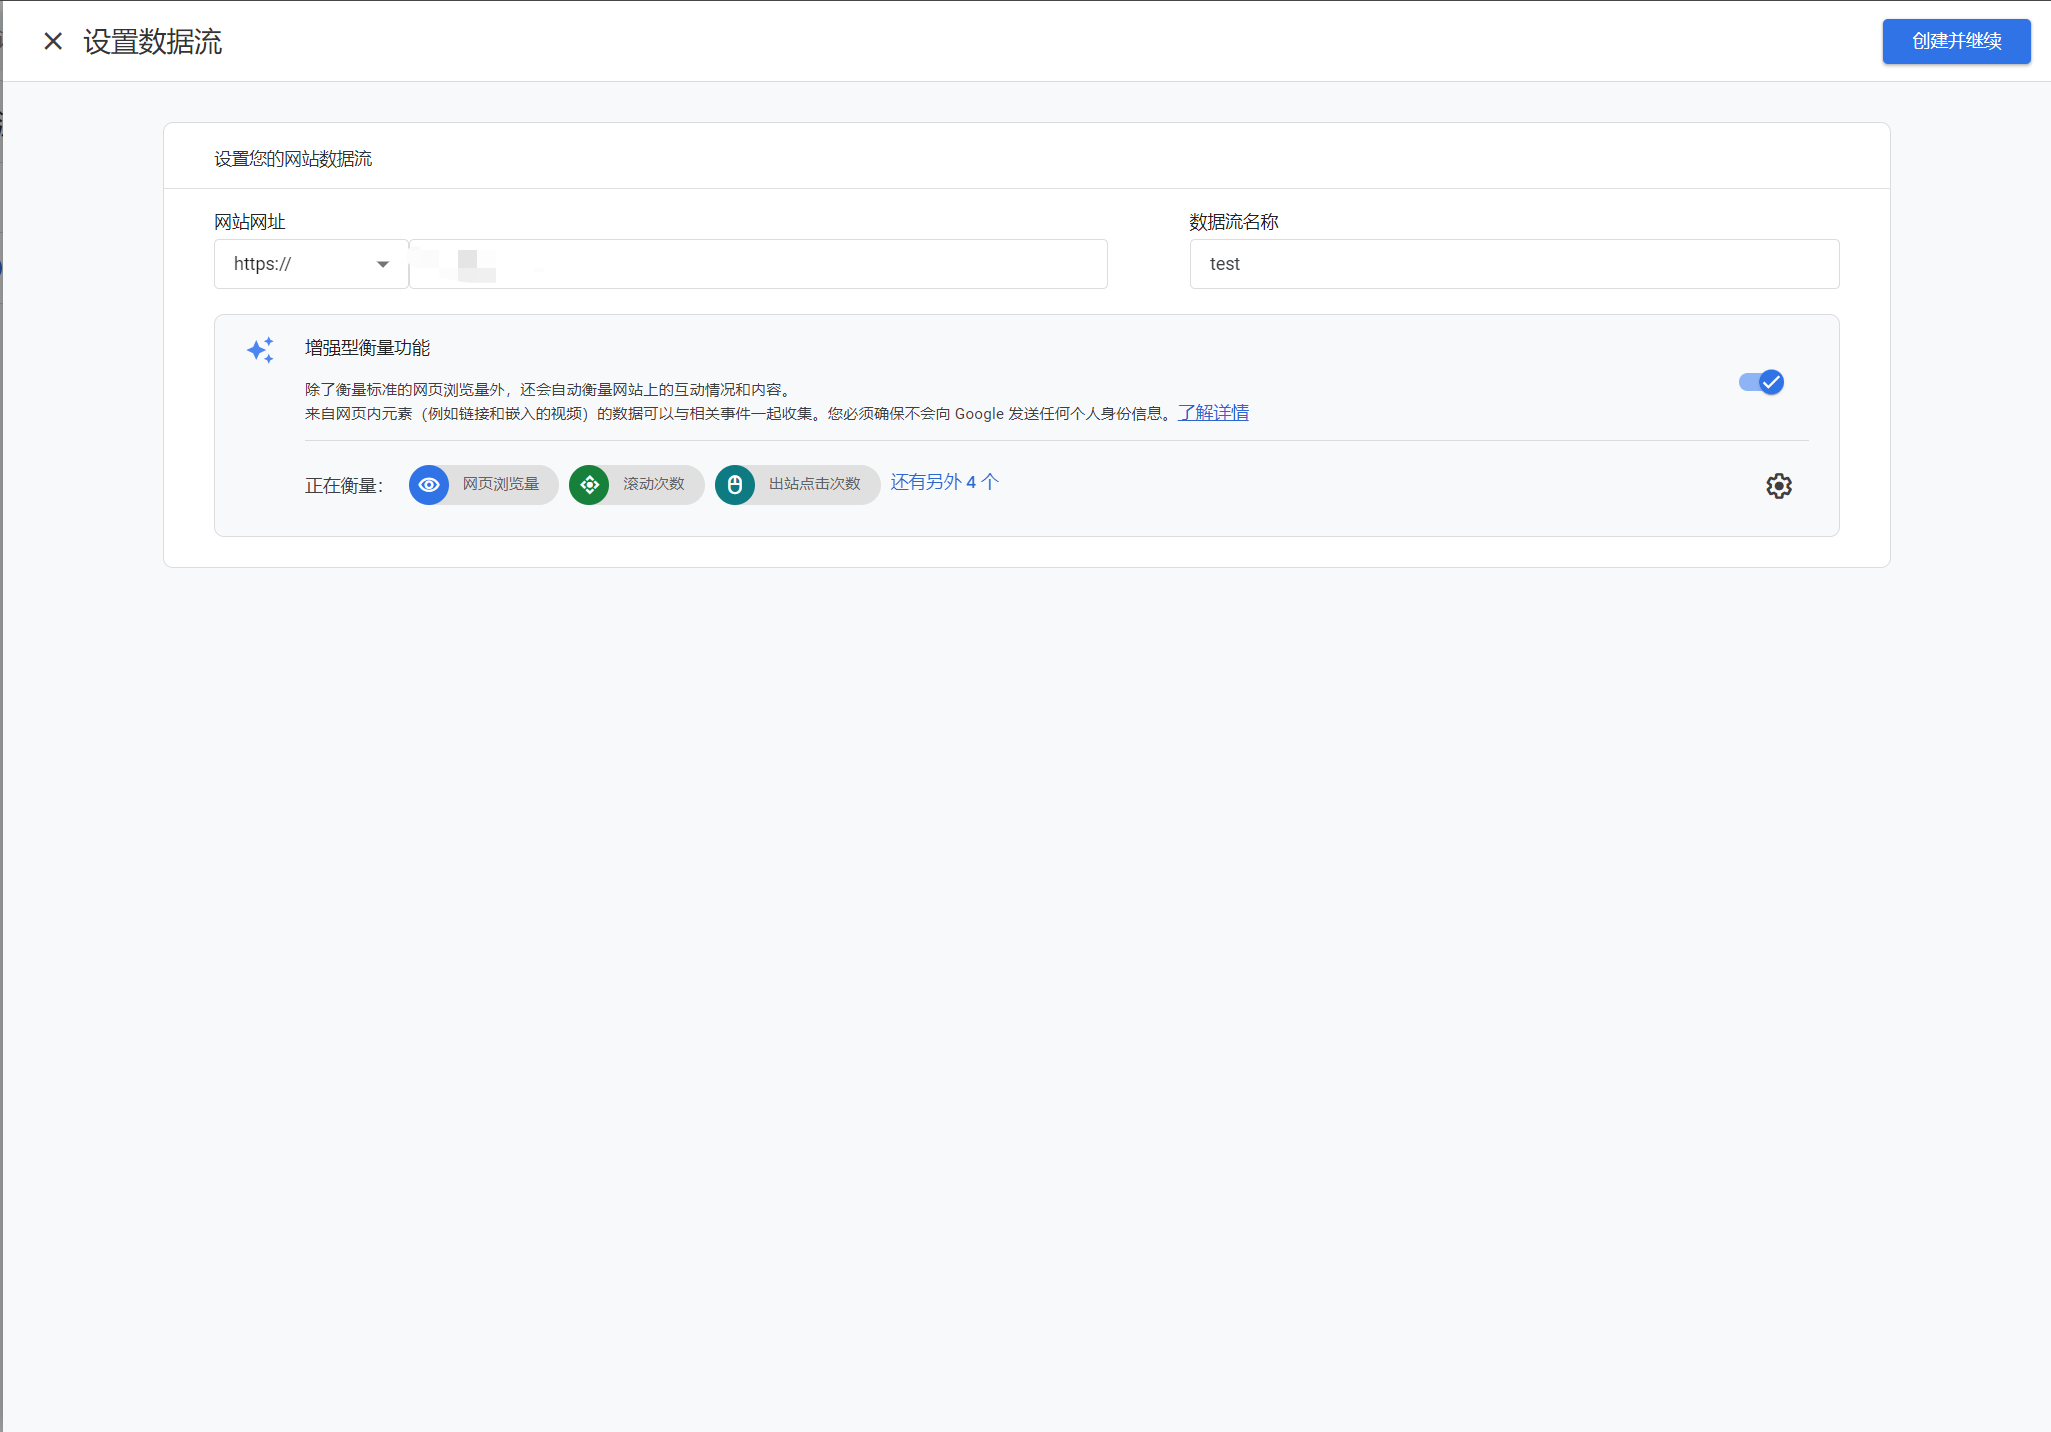
根据网站创建新的数据流

在设置 Google 代码的区域:
1
2
3
4
5
6
7
8
9
| <!-- Google tag (gtag.js) -->
<script async src="https://www.googletagmanager.com/gtag/js?id=G-XXXXXXXXXX"></script>
<script>
window.dataLayer = window.dataLayer || [];
function gtag(){dataLayer.push(arguments);}
gtag('js', new Date());
gtag('config', 'G-XXXXXXXXXX');
</script>
|
其中的G-XXXXXXXXXX就是所需的追踪 ID。
修改 hugo 配置#
- 在网站根目录中的
hugo.toml中,将[params.analytics.google]字段删去,将文件开头的googleAnalytics字段修改为ID,并在末尾添加以下信息:
1
2
3
| [services]
[services.googleAnalytics]
ID = 'G-XXXXXXXXXX'
|
在主题的layouts文件夹下新建文件夹_internal,并在其中新建文件google_analytics.html,将之前在 Google 代码区域获得的代码放入其中。
修改layouts/partials/文件夹中的head.html,在末尾增加:
1
2
3
| {{- with site.Config.Services.GoogleAnalytics.ID -}}
{{- template "_internal/google_analytics.html" . -}}
{{- end -}}
|
- 重新部署,过一段时间就能在 Google Analytics 页面看到访问的数据了。但是奇怪的是在代码
6.2 百度统计#
新增站点#
登录百度统计的使用设置界面,按照要求新增网站,然后点击“获取代码”按钮,将“新版统计代码获取”区域的代码复制下来。
修改 html#
进入到 PaperMod 主题的layouts/partials文件夹,修改extend_head.html文件,在其中加入刚刚复制下来的代码。
检测生效#
重新部署。然后用手动检查或者百度统计助手来检测是否添加功能成功。

